
Mastering the Art of Making Text Fit Into Excel Cells: A Step-by-Step Guide

Mastering the Art of Making Text Fit Into Excel Cells: A Step-by-Step Guide
Quick Links
- Benefits of Shrinking Text in Excel
- How to Shrink Text in Excel on Windows
- How to Shrink Text in Excel on Mac
Sometimes you want your Excel spreadsheet to have a good appearance in addition to displaying the data. Rather than wrapping text in a cell or adjusting a cell’s size to accommodate the text, you can shrink the text to fit.
Let’s look at the advantages of using the shrink text feature and how to use it in Microsoft Excel on Windows and Mac.
Benefits of Shrinking Text in Excel
Here are a few reasons to use Excel’s shrink text feature.
- You can save time by avoiding trying different font sizes to get the text to fit inside the cell.
- If you change the font size or style in your sheet or for selected cells, those cells you apply the shrink to retain the smaller size to fit the cells.
- You can keep your cells and columns the size you want without sacrificing appearance by making them larger to fit the text.
- If you adjust the cell size after you shrink the text, that text will adjust its size to fit the cell.
How to Shrink Text in Excel on Windows
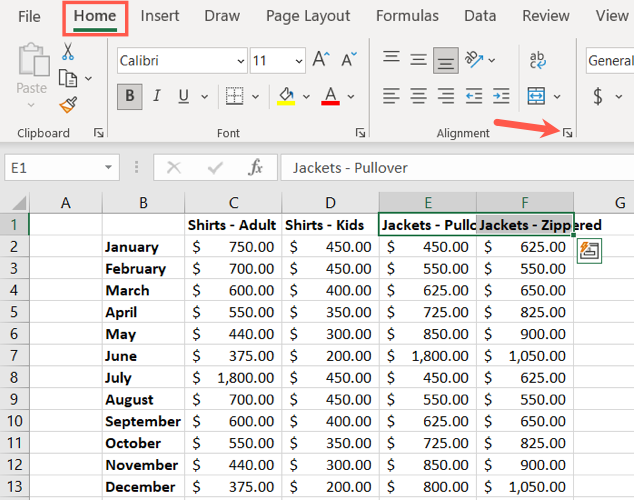
In Excel on Windows, select one or more cells containing the text you want to shrink. Go to the Home tab and click the arrow in the bottom right corner of the Alignment section of the ribbon.
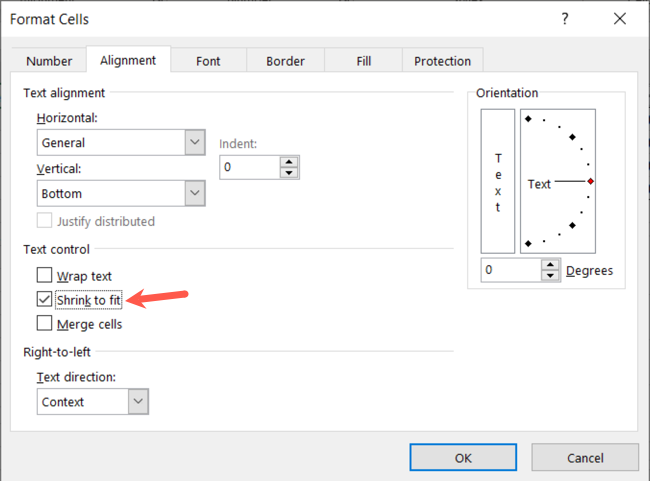
Check the box for Shrink to Fit in the Text Control section of the window and click “OK.”
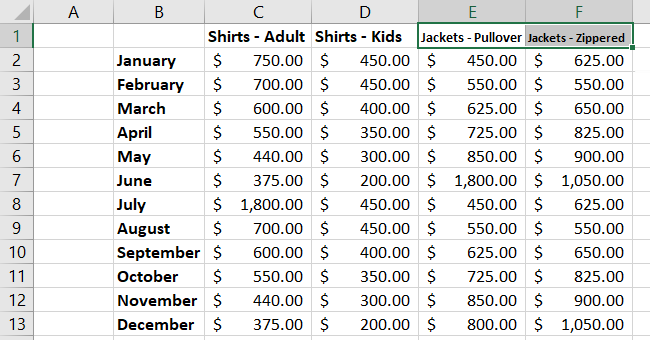
You’ll then see your change with the text sized to fit within the cell.
If you change your mind later and want to undo the shrink you applied, simply follow the same steps above and uncheck the Shrink to Fit box.
How to Shrink Text in Excel on Mac
In Excel on Mac, select one or more cells containing the text you want to shrink. Go to the Home tab and click the arrow next to the Wrap Text button in the Alignment section of the ribbon. Choose “Shrink Text to Fit.”
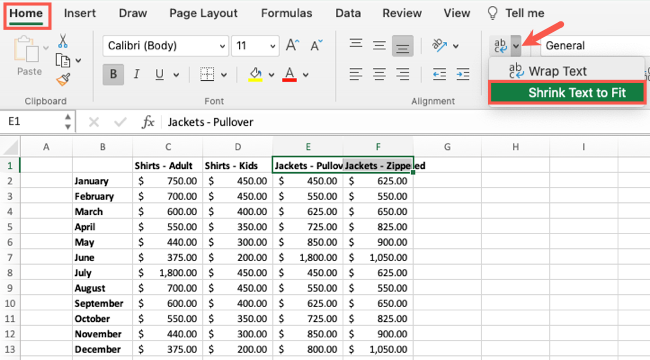
You should then see the text in the selected cell(s) update to fit inside.
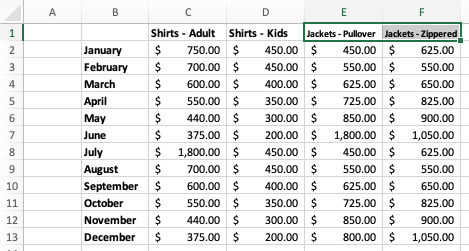
If you want to return the text to its original size, follow the same steps as above and select “Shrink Text to Fit” to remove the checkmark.
For an easy, time-saving way to make text fit perfectly inside a cell, remember this shrink text feature in Excel. You’re then free to add as much text as you want without fear of breaking your spreadsheet’s look!
Related: How to Set Row Height and Column Width in Excel
Also read:
- [New] Insert Audio Files Into PowerPoint Sequences for 2024
- 2024 Approved In-Depth Motion Evaluation 2023
- Chrome & Firefox Tips: Solving the Problem of Stalled Video but Ongoing Audio on YouTube
- How to Stop Your Disco Elysium Adventure From Crashing on PC: A Comprehensive Guide
- In 2024, How To Unlock a Nokia C12 Plus Easily?
- LOL Gaming On Air Top 3 Recording Methods
- Mastering AdSense on YouTube A Beginner's Guide
- PC Gaming Guide: Solving Freezing and FPS Dips in SIFTU – Expert Advice
- The Best Live Streaming Apps List for YouTube Content Creators (iOS/Android)
- Troubleshooting Black Ops Cold War: Overcoming Error Code 0Xc0000005
- Title: Mastering the Art of Making Text Fit Into Excel Cells: A Step-by-Step Guide
- Author: Paul
- Created at : 2024-12-02 16:23:15
- Updated at : 2024-12-06 16:01:43
- Link: https://win-able.techidaily.com/mastering-the-art-of-making-text-fit-into-excel-cells-a-step-by-step-guide/
- License: This work is licensed under CC BY-NC-SA 4.0.